Texによる文書作成41 ~電気回路の作図11
前回に続きはTeXを用いた電気回路図の作成のうち、ブロック図のコンポーネントの表示について紹介したい。
1. ブロックコンポーネント
前回紹介できなかったコンポーネントについて紹介する。いずれも名称とコードが一致するので覚えやすいと思う。
AD変換器は[adc]、DA変換器は[dac]で表示する。
\begin{figure}
\begin{center}
\begin{circuitikz}
\draw (0,0) to [adc]++(1,0);
\draw (1.5,0) to [dac] ++(1,0);
\end{circuitikz}
\caption{AD,DA変換}
\end{center}
\end{figure}

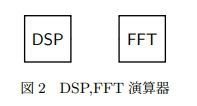
\begin{figure}
\begin{center}
\begin{circuitikz}
\draw (0,0) to [dsp] ++(1,0);
\draw (2,0) to [fft] ++(1,0);
\end{circuitikz}
\caption{DSP,FFT演算器}
\end{center}
\end{figure}
回路のOPアンプとは別にブロック図でのアンプがあり、[amp]で表示できる。また可変増幅の場合は[vamp]で表示する。
\begin{figure}
\begin{center}
\begin{circuitikz}
\draw (0,0) to [amp] ++(1,0);
\draw (2,0) to [vamp] ++(1,0);
\end{circuitikz}
\caption{アンプ}
\end{center}
\end{figure}

移相器は[phaseshifter], 可変移相器の場合は[vphaseshifter]で表示できる。
\begin{figure}
\begin{center}
\begin{circuitikz}
\draw (0,0) to [phaseshifter] ++(1,0);
\draw (2,0) to [vphaseshifter] ++(1,0);
\end{circuitikz}
\caption{移相器}
\end{center}
\end{figure}

ディテクターは[detector]で表示する・
\begin{figure}
\begin{center}
\begin{circuitikz}
\draw (0,0) to [detector] ++(1,0);
\end{circuitikz}
\caption{ディテクター}
\end{center}
\end{figure}

2. 4ポートデバイス
一般的な4ポートデバイスは[fourport]で表示できる。4つのポートは、port1,port2,port3,port4で位置を指定できる。
\begin{figure}
\begin{center}
\begin{circuitikz}
\draw (0,0) node[fourport] (f) {}
(f.port1) to[short,-o] ++(-0.5,0)
(f.port2) to[short,-o] ++(0.5,0)
(f.port3) to[short,-o] ++(0.5,0)
(f.port4) to[short,-o] ++(-0.5,0)
(f.port1) node[below left] {\texttt{port1}}
(f.port2) node[below right] {\texttt{port2}}
(f.port3) node[above right] {\texttt{port3}}
(f.port4) node[above left] {\texttt{port4}};
\end{circuitikz}
\caption{4port}
\end{center}
\end{figure}

他に4ポートをもつデバイスとしてカプラーがあり、couplerで表示できる。ポートの位置は4ポートデバイスと異なり、ポートの位置left down, right down, left up, right downで指定する。
\begin{figure}
\begin{center}
\begin{circuitikz}
\draw (0,0) node[coupler] (c) {}
(c.left down) to[short,-o] ++(-0.5,0)
(c.right down) to[short,-o] ++(0.5,0)
(c.right up) to[short,-o] ++(0.5,0)
(c.left up) to[short,-o] ++(-0.5,0)
(c.left down) node[below left] {\texttt{left down}}
(c.right down) node[below right] {\texttt{right down}}
(c.right up) node[above right] {\texttt{right up}}
(c.left up) node[above left] {\texttt{left up}};
\end{circuitikz}
\caption{4portカプラー}
\end{center}
\end{figure}

カプラーの矢印が丸まっている[coupler2]も利用できる。ポートの位置はcouplerと同じ。
\begin{figure}
\begin{center}
\begin{circuitikz}
\draw (0,0) node[coupler2] (c) {}
(c.left down) to[short,-o] ++(-0.5,0)
(c.right down) to[short,-o] ++(0.5,0)
(c.right up) to[short,-o] ++(0.5,0)
(c.left up) to[short,-o] ++(-0.5,0);
\end{circuitikz}
\caption{4portカプラー2}
\end{center}
\end{figure}

3. まとめ
今回はブロック図に用いられるコンポーネントの表示について紹介した。